Sometimes you need to remove the dash to make it easier to work on things like HEVAC Blend and Distribution Motors, Heater Core O-rings, or remove the whole heater unit.
There are work-arounds and short cuts for some procedures, but I wanted to remove the whole dash top so I could get a good look at the Blend Motors. I also figured that if I found a problem with the heater core, it would be easy enough to keep going with most of the work done in getting to it.
Preparation:
- Park the car in a location where you will have good access through the passenger door (Right Hand Drive) as this is where you will be removing the dash through.
- Move the front seats as far back as possible. You will want as much room as possible to work in the front area.
- DISCONNECT THE BATTERY. You will be working around the electrics and SRS air bag components, and do not want to risk shorting something for your own personal safety, and the electrics of you car.
- Usual common sense rules apply… with the battery disconnected, leave the front windows open and keep the keys outside of the car.
- A lot of safe storage space for all the bits you will be removing.
- Lots of small plastic bags and a permanent marker to collect screws, bolts etc and label the bags as you go.
- Good lighting. A hand held torch and one of those cool LED bat lamps (the two hinged light panels) are really handy.
Tools:
- Usual collection of flat head and phillips head screw drivers
- 7 and 8mm sockets
- E10 and E11 Torx sockets
- Wire cutters/snips
Let’s Go:
| Step | Description | Image (clicking on the image should open a browser with a larger image) |
| 1 | Start under the steering wheel and remove the 4 phillips head bolts from the panel with the heater duct. Lower the panel and disconnect the duct. | 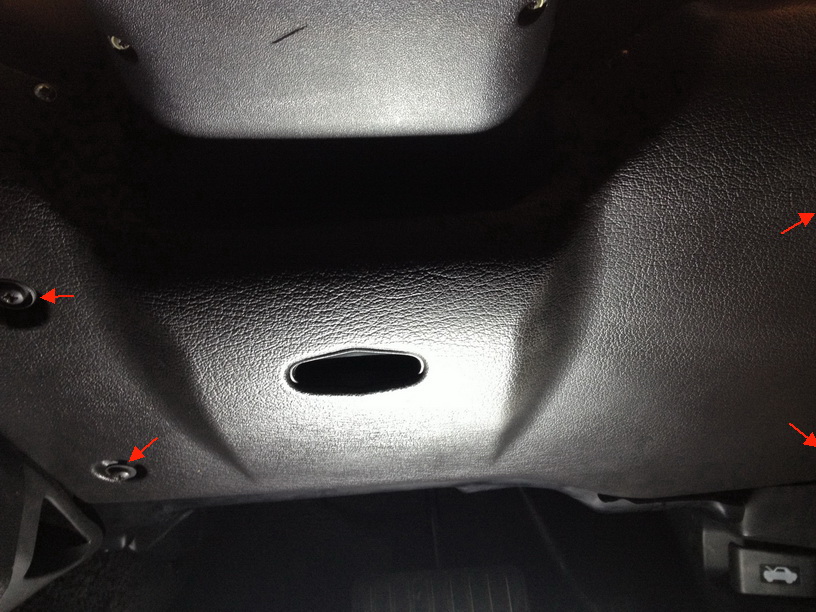 |
| 2 | Remove the RH panel from the lower centre console by removing the two screws, then grab the panel and rotate it clockwise while pulling towards the rear of the car. |  |
| 3 | Remove the windows switch pack by removing the two screws in the cubby box. |  |
| 4 | Tilt the unit forward and work the hand brake cover off by twisting and pulling | 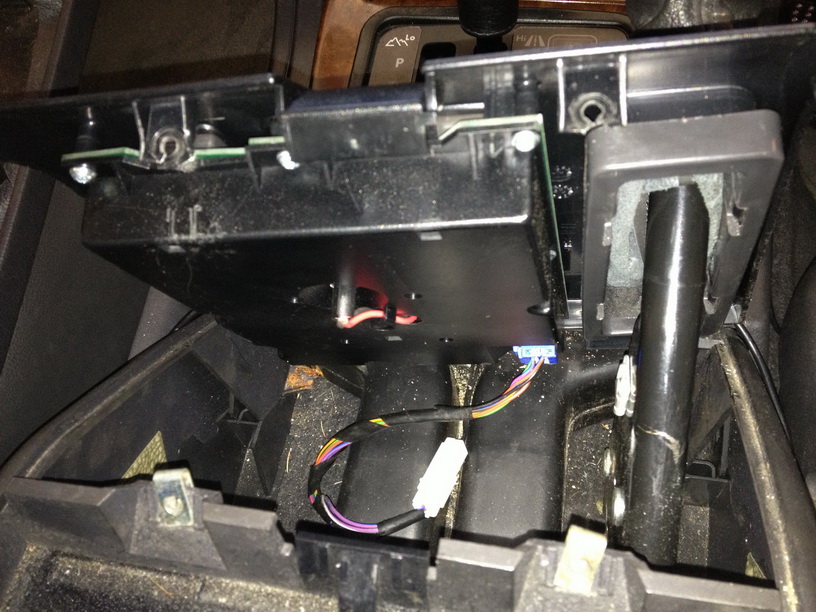 |
| 5 | Remove the screw in the transmission cover. |  |
| 6 | Move the gear selector back to N to make access easier to remove the cover. | 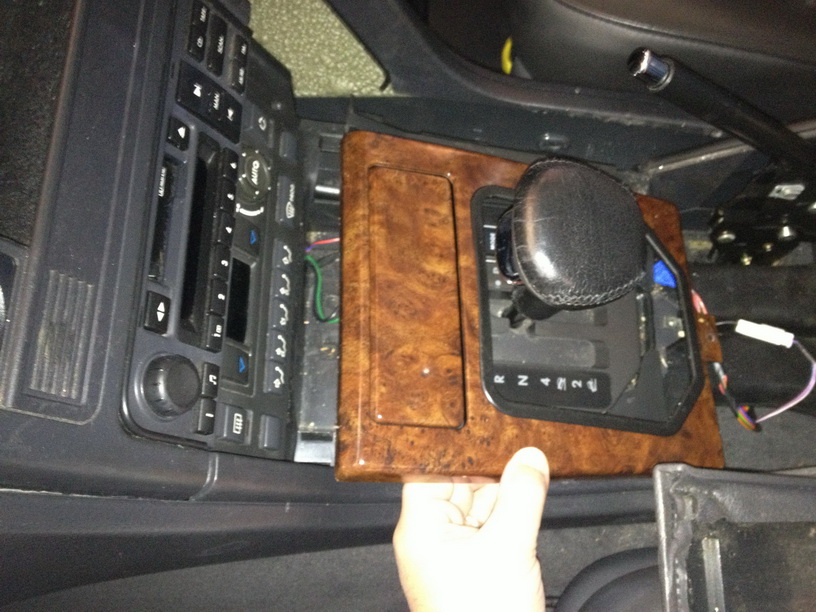 |
| 7 | Lift the cover, tilt and remove the two connectors to the cigarette lighter. |  |
| 8 | Under the LH Dash, remove the three screws holding the panel. | 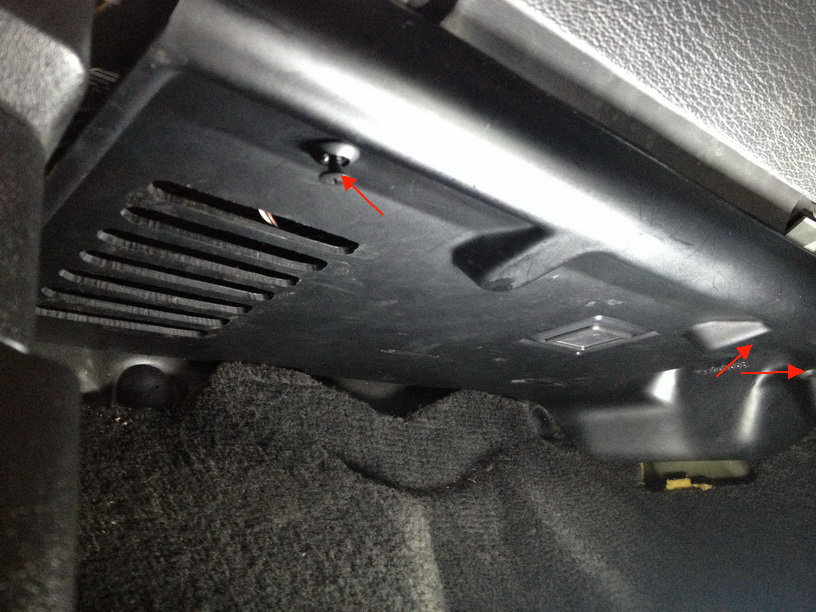 |
| 9 | Lower the panel and disconnect the light. Then press the two lugs holding the OBDII plug in, and withdraw the plug |  |
| 10 | The bolts holding the glove box in place will now be exposed. | 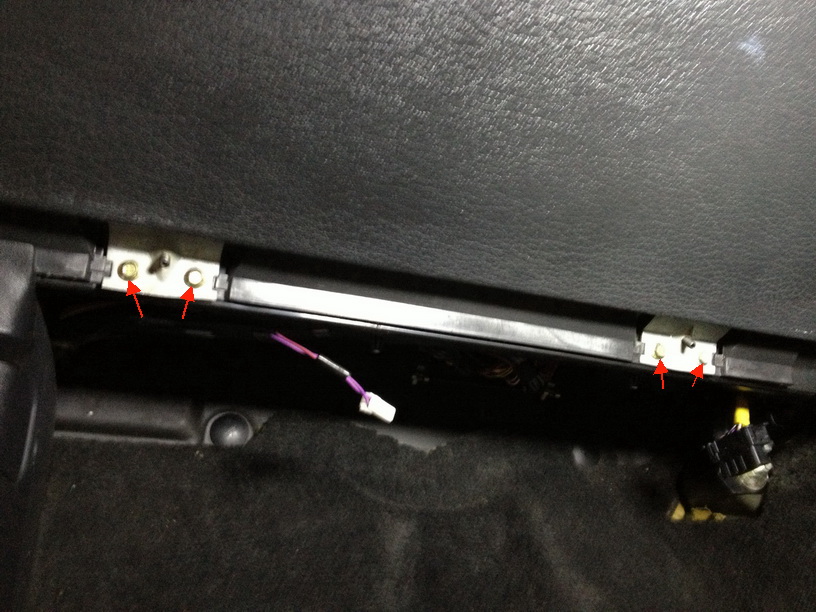 |
| 11 | Remove the four bolts, and collect the two adjustment plates/nuts that fall out. | 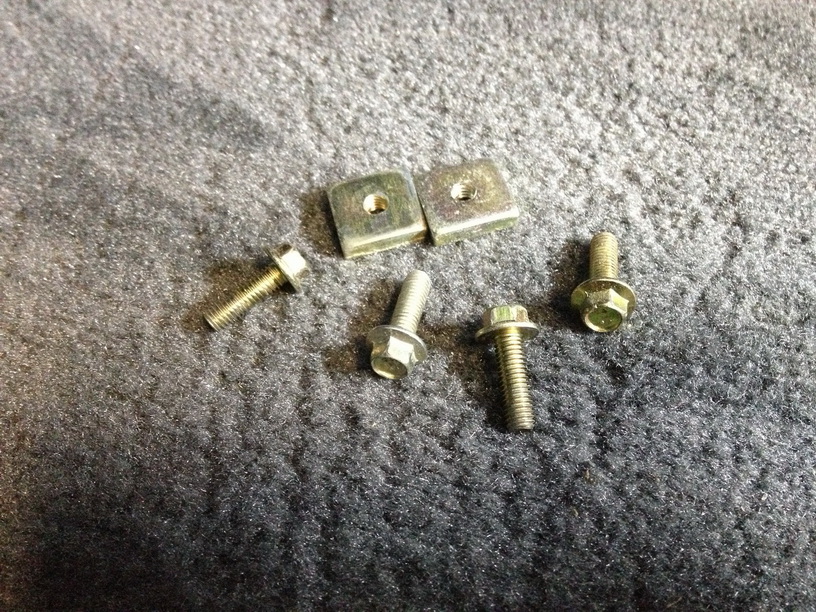 |
| 12 | Open the glove box and remove the three screws holding the top in place. |  |
| 13 | Lower the glove box and remove the two bolts attached to the strut. | 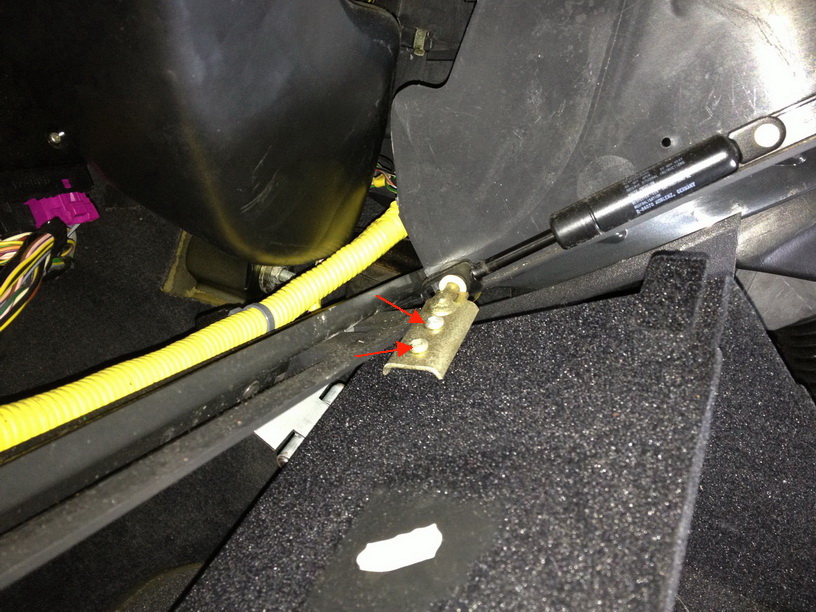 |
| 14 | Remove the two screws holding the surround. | 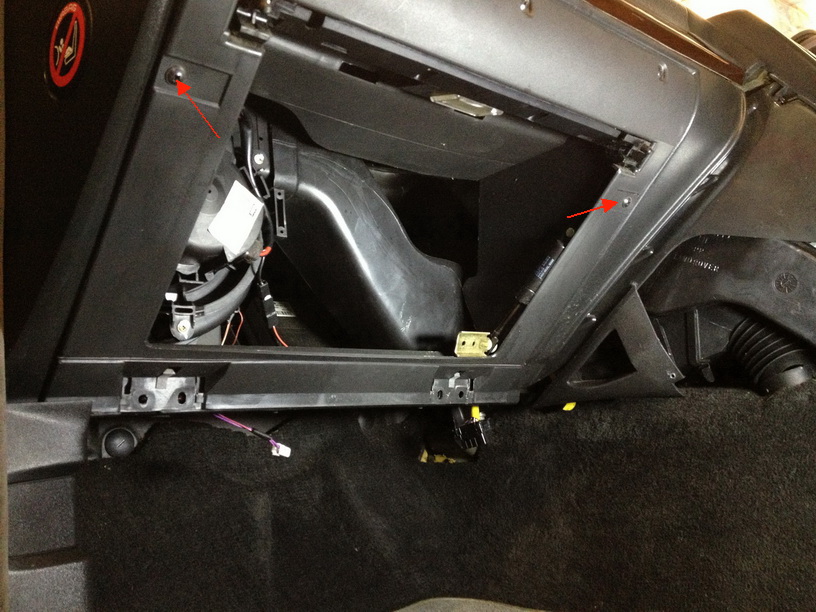 |
| 15 | Lower the surround and disconnect the light. Remove the catch mechanism by depressing the two lugs shown and pulling the mechanism upwards. Remove the surround so we can get to the SRS Air Bag. | 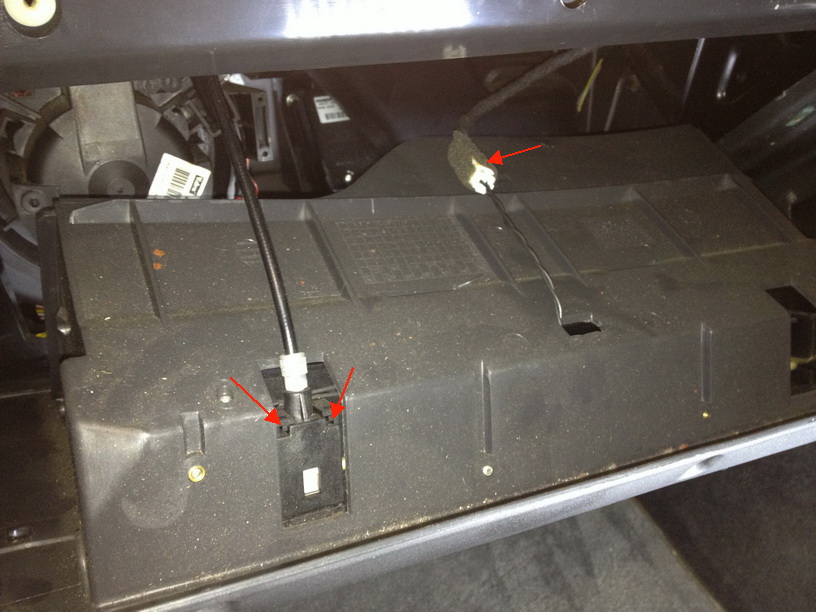 |
| 16 | The four E10/11 Torx bolts will now be visible from below. Two are shown below. The others are towards the firewall. |  |
| 17 | Before we can remove the passenger SRS Air Bag, we need to remove the fascia panel below the front lip of the SRS Air Bag. Use plastic furniture removal clips or a couple of flat head screw drivers and ease the panel off. The second photo below shows the panel removed and the lugs that hold it in place. Be gentle and work it off from one end. |   |
| 18 | Now the SRS Air Bag will come out easily. |  |
| 19 | Remove the two screws holding the glove box button in place, and then remove the button assembly along with the cable, noting how the cable sits up behind the SRS Air Bag. | 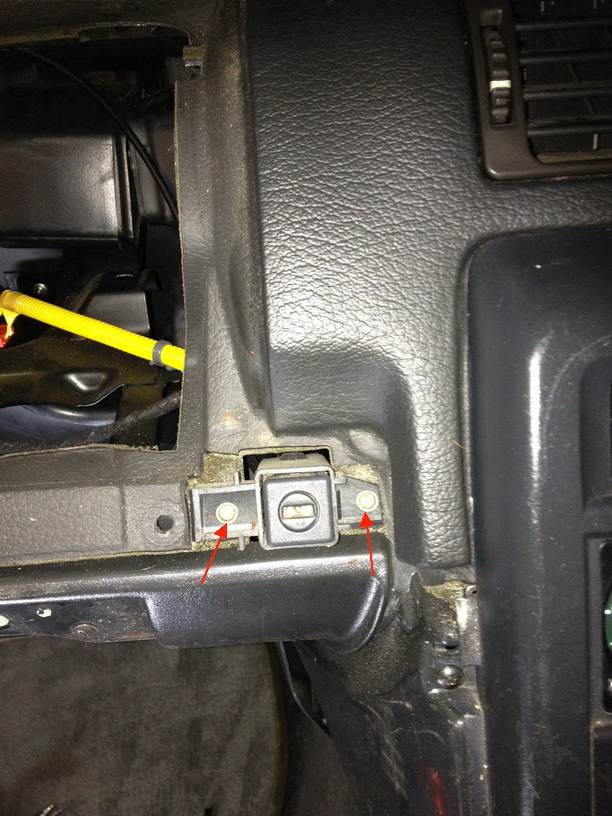 |
| 20 | Now we can remove the screws holding the lower dash on the passenger side. |  |
| 21 | Now remove the HEVAC control panel. Just the four screws shown, pull the panel forward and remove the electrical connectors. Also remove the screw to the left of the clock as shown. |  |
| 22 | Remove the rubber surround from the stereo, if it has one. 2000 model Alpine unit shown below. | 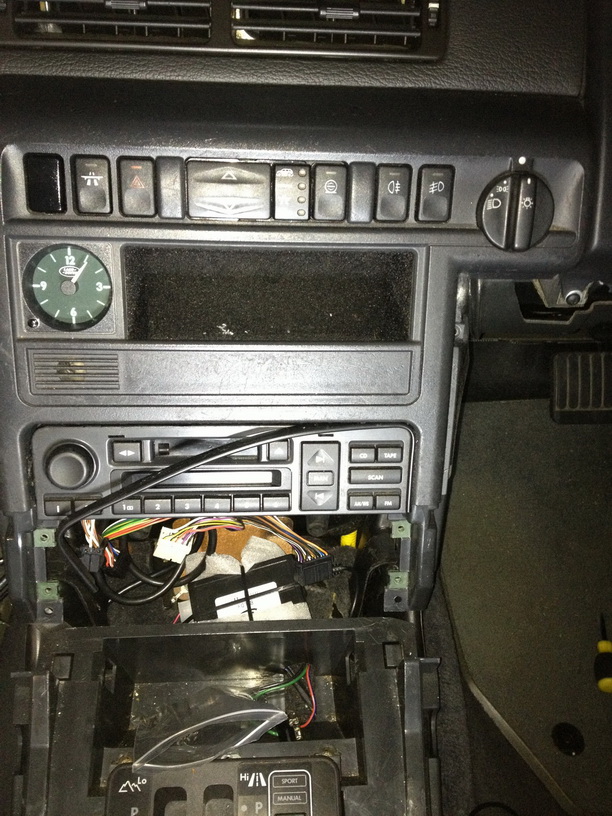 |
| 23 | Use a couple of long flat metal strips to unlock the stereo head unit. I didn’t have the correct tools so made these from am old PC expansion slot blanking plate I had lying around. Disconnect the wires and aerial from the stereo and move it out of the way. | 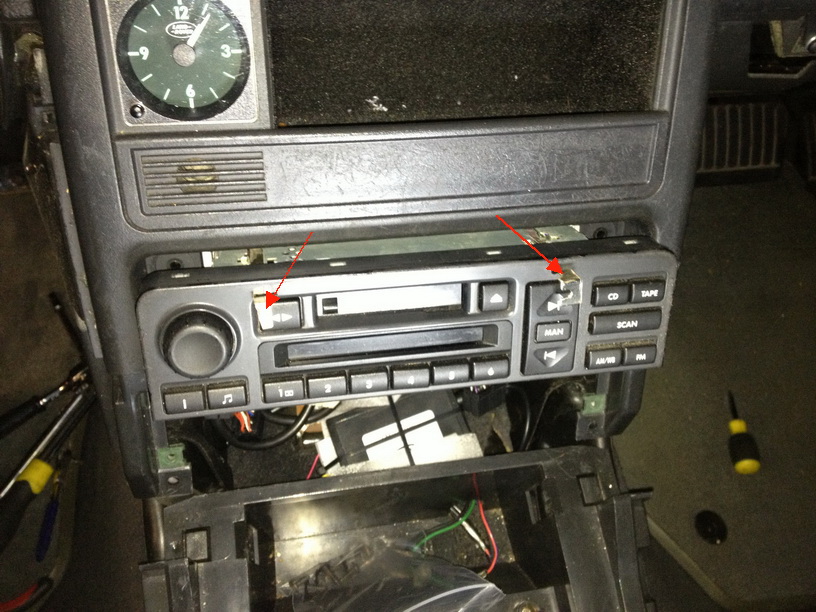 |
| 24 | Remove the two screws shown. | 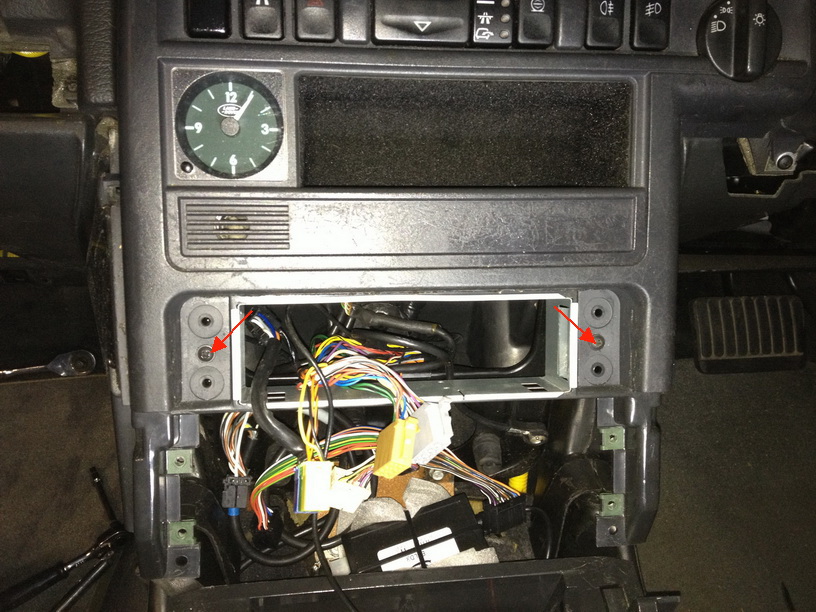 |
| 25 | Before we can remove the upper centre console panel, we need to remove the instrument binnacle. Remove the upper and lower LH screws as shown. | 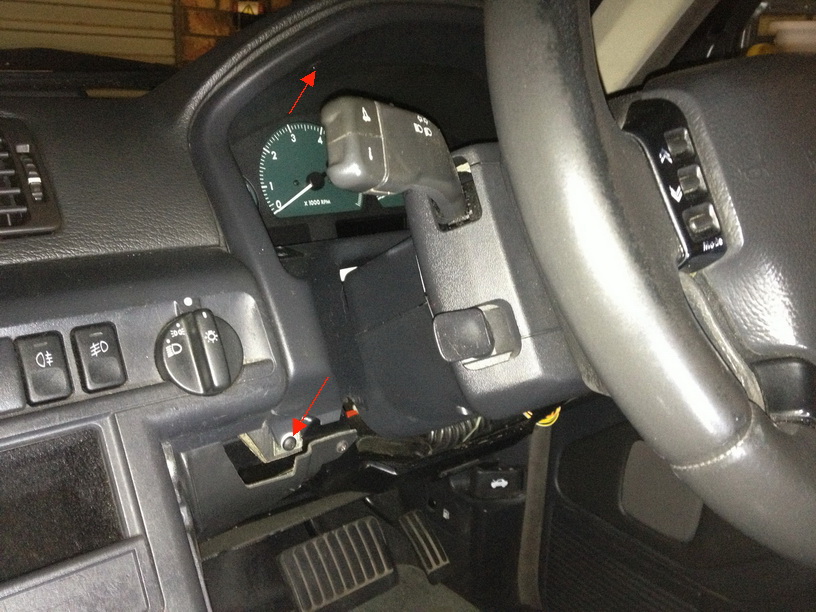 |
| 26 | Now remove the upper and lower RH screws indicated. The instrument binnacle will just pull out. Remember to disconnect the plug to the fuel flap release button. |  |
| 27 | Now we can remove the instrument cluster by removing the four screws indicated with angled arrows, and the two multi-plugs indicated with vertical arrows. | 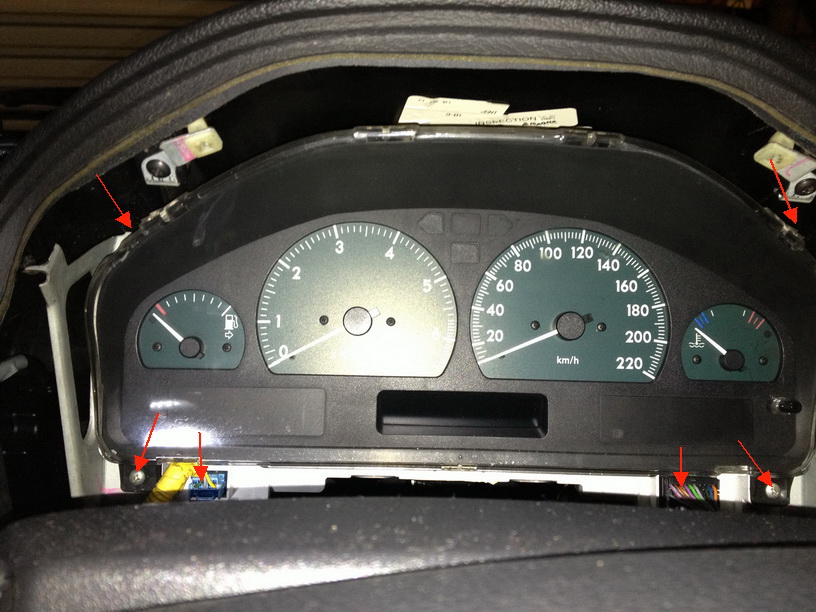 |
| 28 | The last screw holding the upper centre console panel is now exposed. Remove it. | 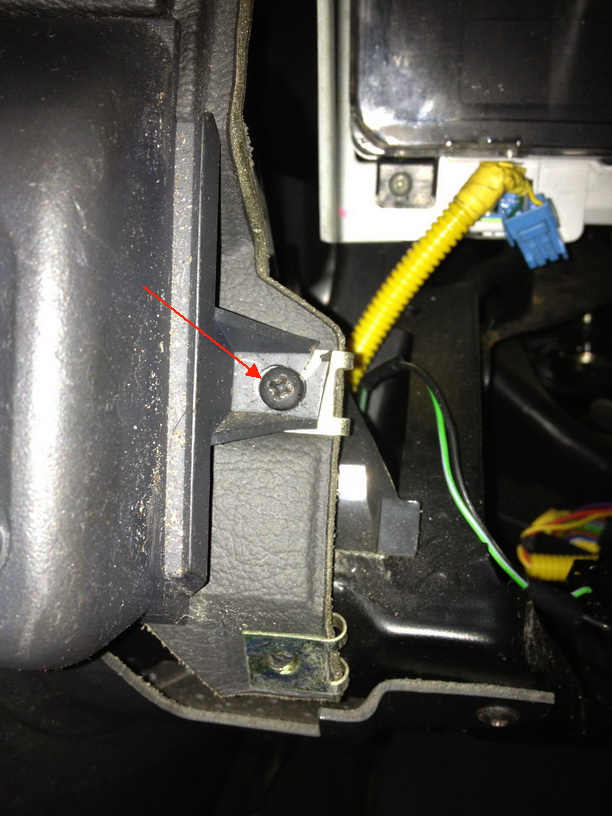 |
| 29 | Tilt the panel forward exposing the connections to switches, clock, temp sensor. Make a note of what colour goes where or keep a photo handy when reassembling. Disconnect everything and remove the panel away. | 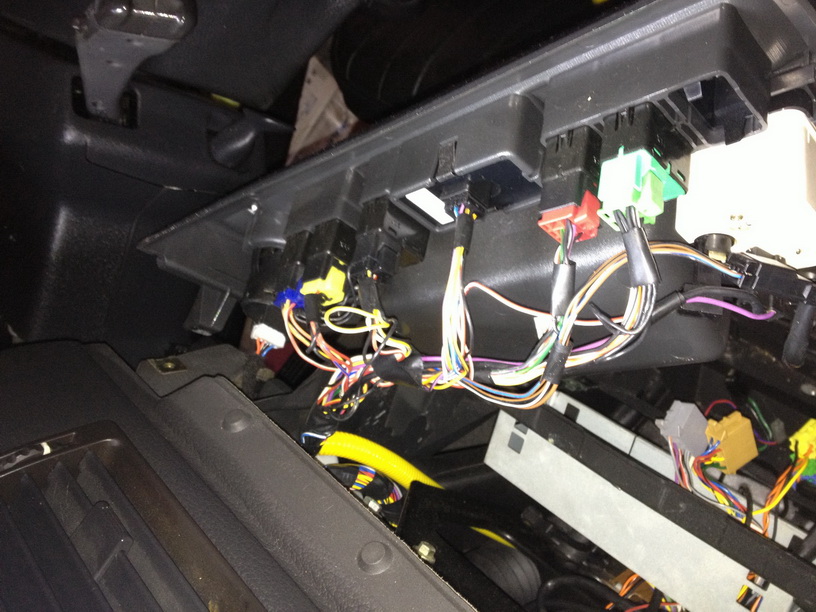 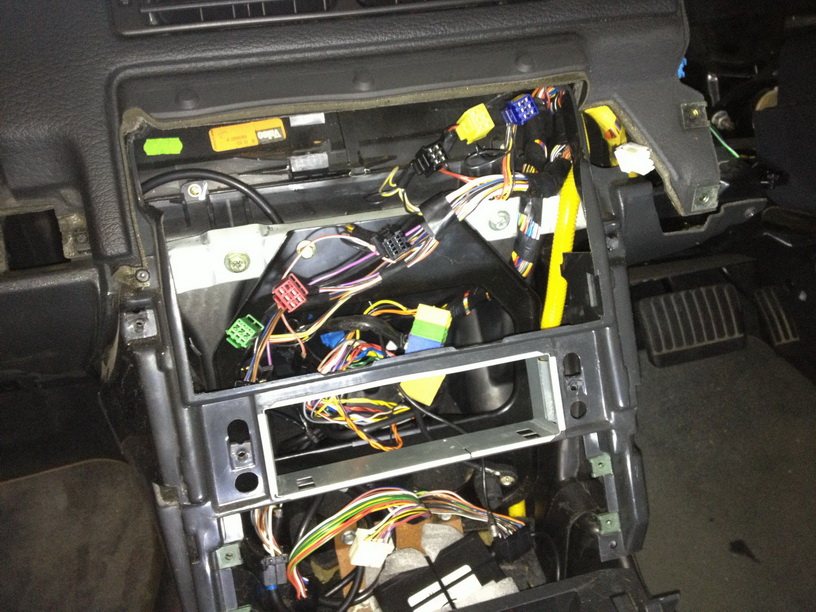
|
| 30 | Looking in through the instrument binnacle hump, we can see a small screw holding the air duct in. Remove it. Circled on the RH side of the photo is where you might have another screw holding the duct in place. This is very difficult to get at and many people decide to cut it instead. Mine had been cut already. Interesting, as this car was a one owner that was always serviced by a Land Rover dealer. | 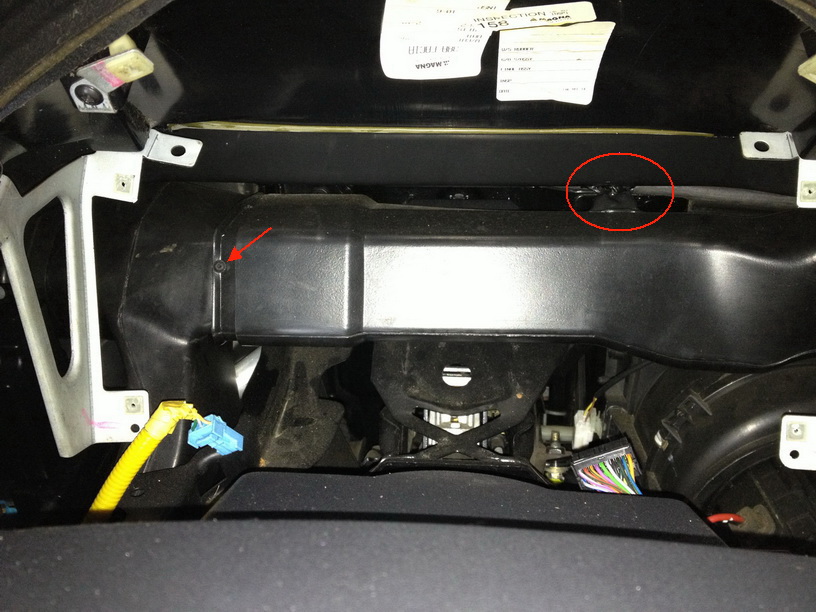 |
| 31 | On the passenger side, we can easily remove the lower duct. | 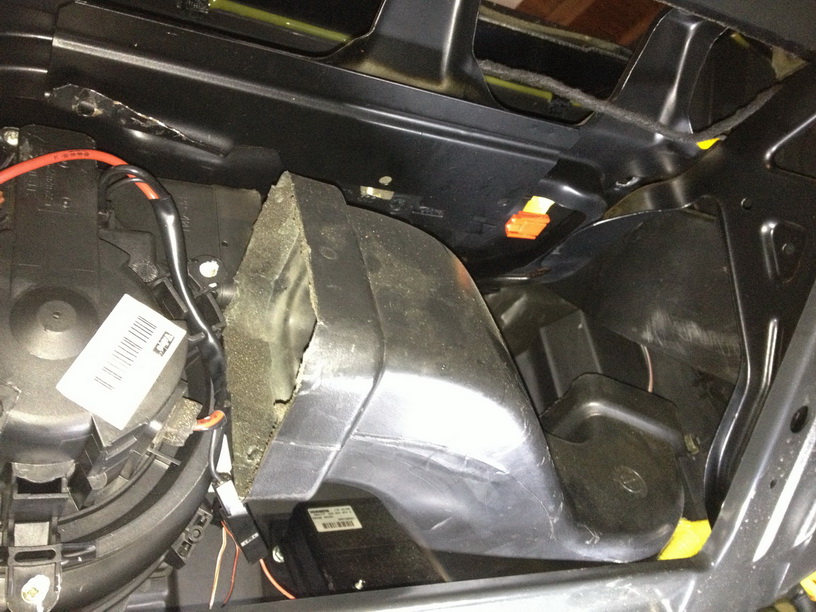 |
| 32 | The upper duct has a hidden screw as shown. You need to get at it from underneath. | 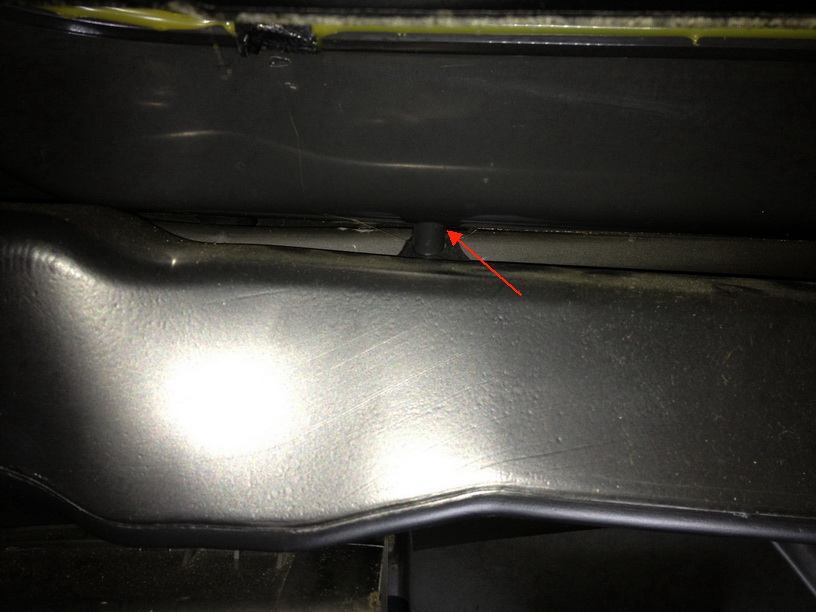 |
| 33 | Back to the drivers side to remove the screws holding the dash in place. These two at the far RH side. | 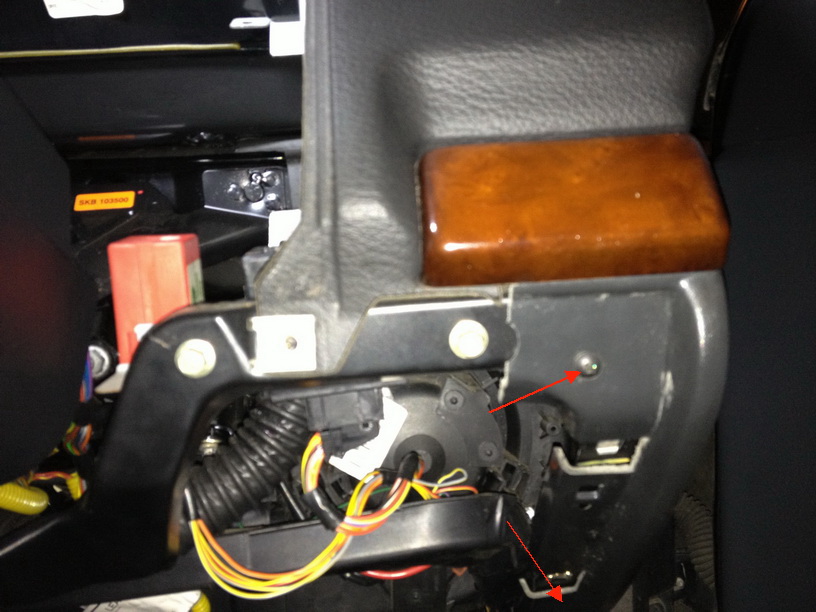 |
| 34 | And a better shot of the lower RH screw. |  |
| 35 | Two screws on the lower left on the drivers side, below the steering column. | 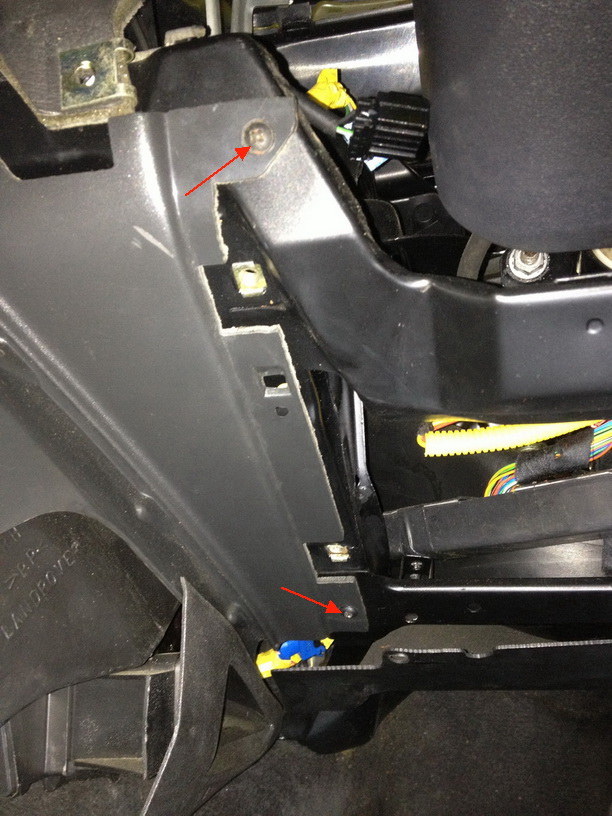 |
| 36 | Remove this vent cover in the foot well, both driver and passenger sides. | 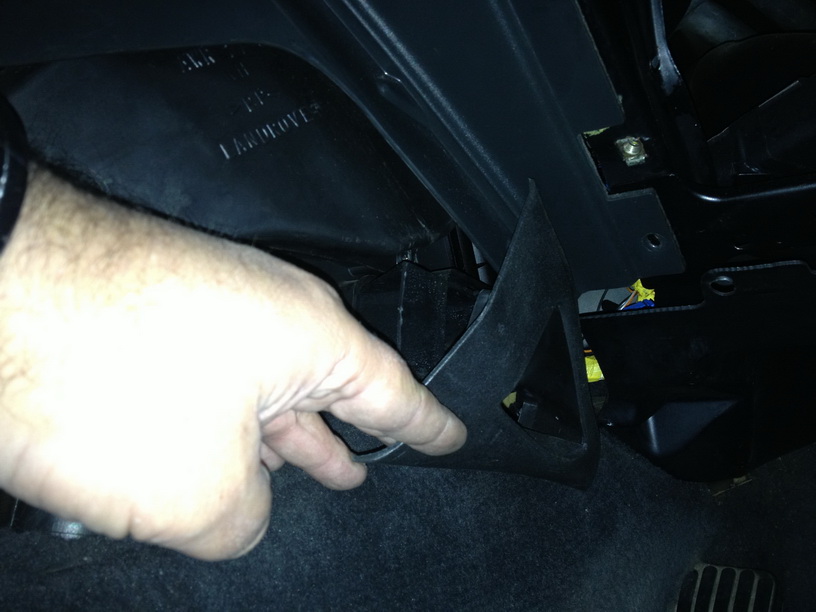 |
| 37 | Now we are ready to move the dash out, almost. Look in through the instrument panel hump and you should see/feel two 8mm bolts in the locations indicted below. (Note: the butchered air duct was not me. I am amazed that this car was only serviced by a Land Rover dealer!) | 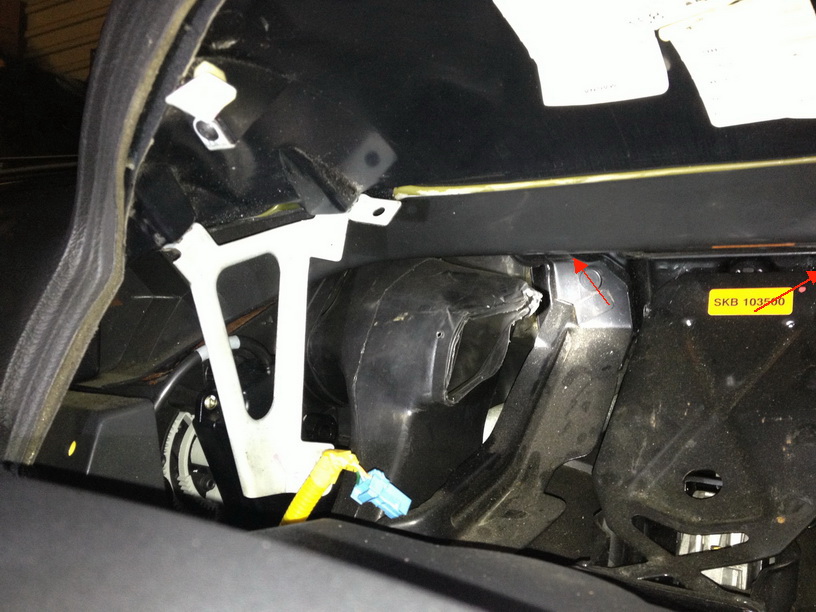 |
| 38 | On the passenger side the two bolts are a bit easier to see/feel. |  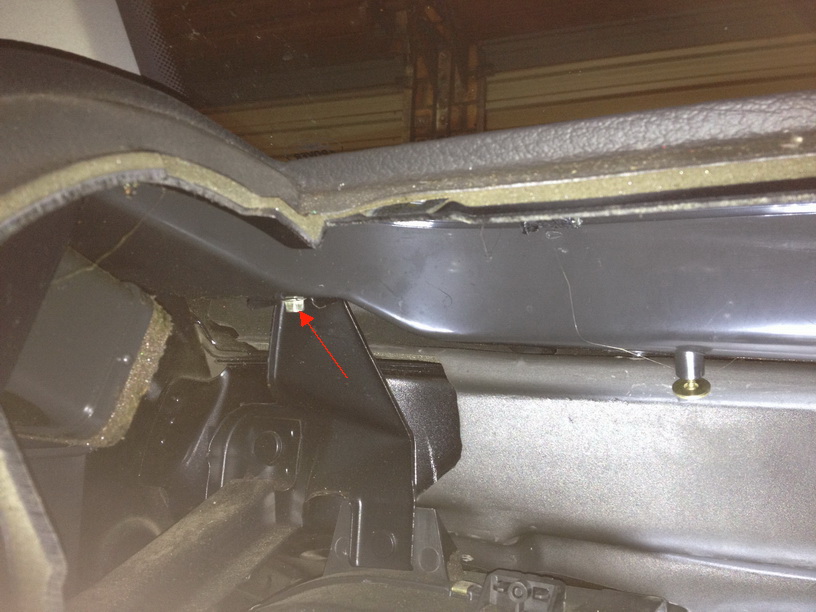 |
| 39 | Remove the A-Pillar covers to avoid damaging them when you pull the dash out. They are just held in with clips that pop out . Easiest to pull down some of the rubber door strip to assist in getting access to the edge of the pillar covers. | 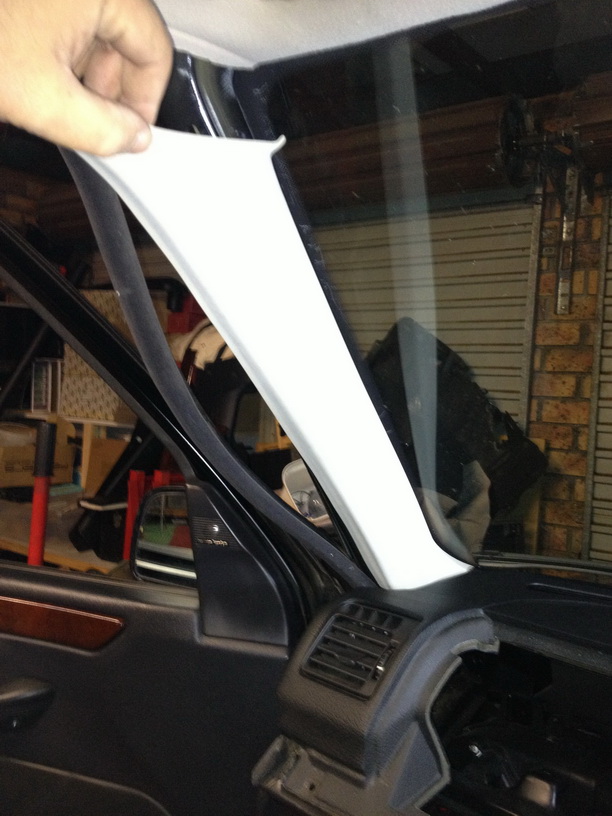 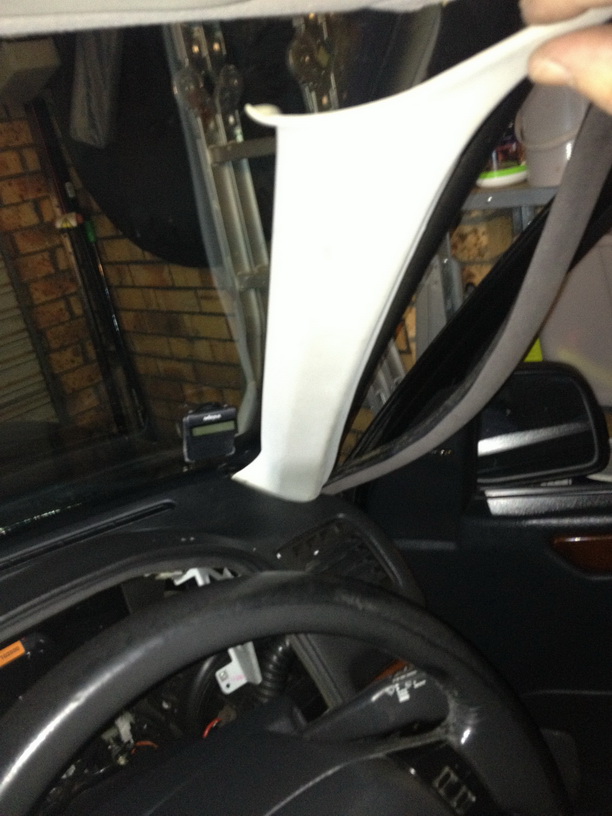
|
| 40 | The light sensor and alarm LED need to be removed before the dash comes out. The centre windscreen duct is secured by eight clips that you can gently press/pull to remove it. |  |
| 41 | Then just unclip the plugs to the light sensor and alarm LED. | 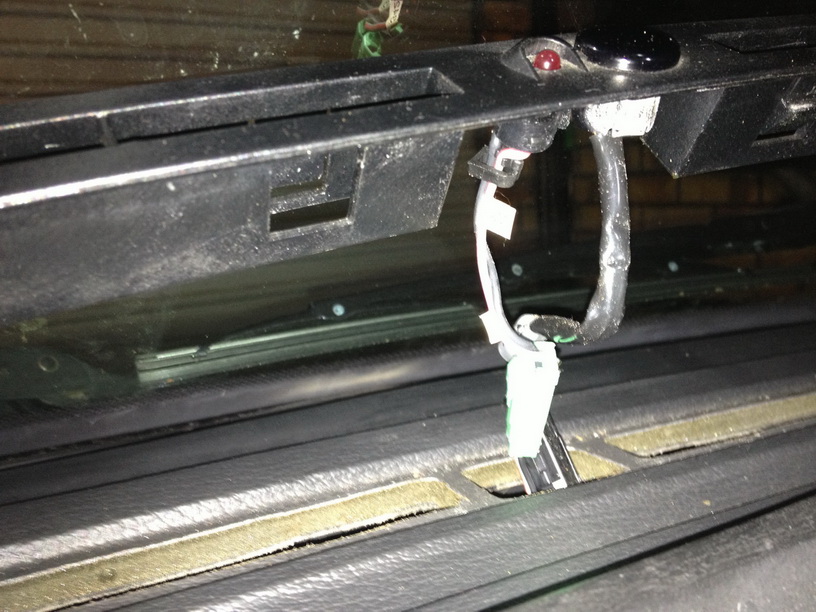 |
| 42 | The dash should now pull forward 10-15cm to allow you to snip the clips holding the passenger SRS Air Bag wiring loom to the underside of the dash. This photo taken from inside the dash where the passenger front SRS Air Bag sits, looking towards the driver’s side. | 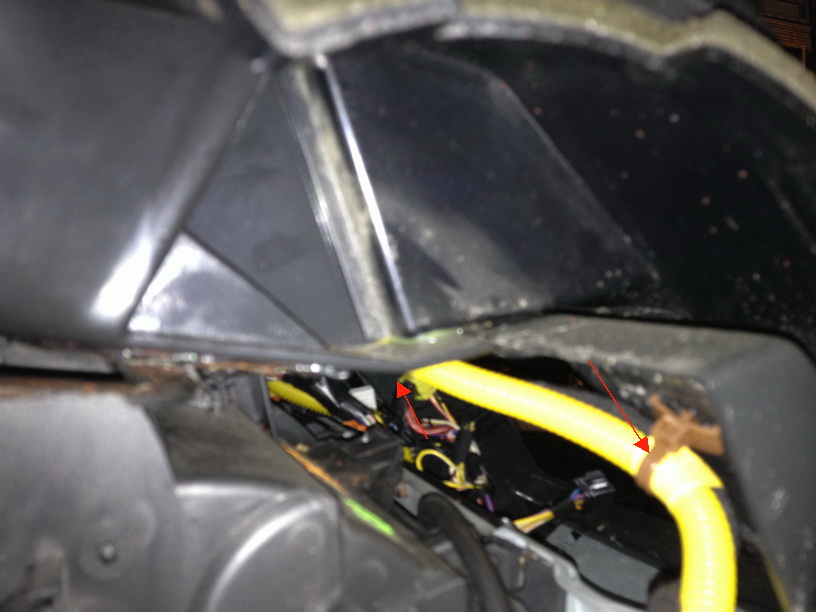 |
| 43 | This photo showing the clip to snip, as viewed from inside the centre console towards the driver’s side. | 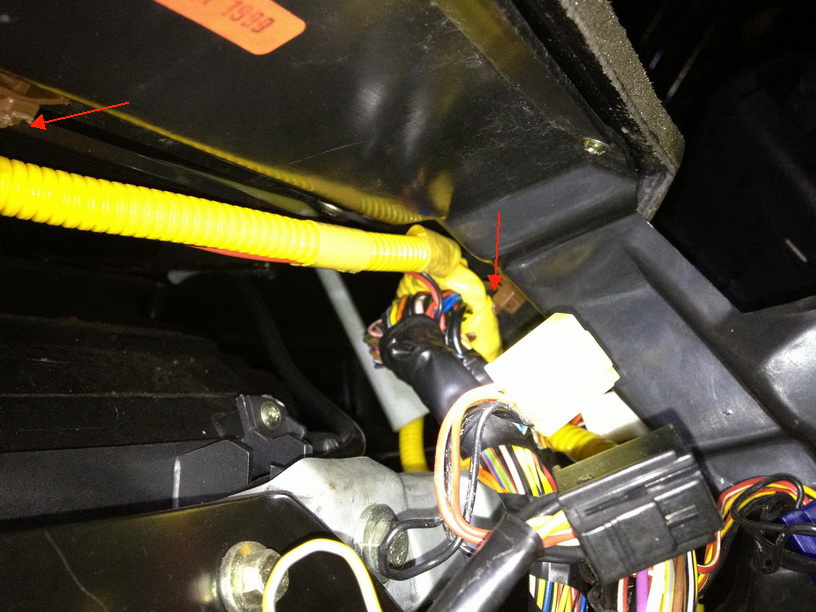 |
| 44 | To assist in getting the dash above and around the steering wheel, it may be useful to take off the plastic RH panel at the edge of the dash. There are two screws holding the panel in place, which are awkward to get at. Approx locations shown with the panel removed. | 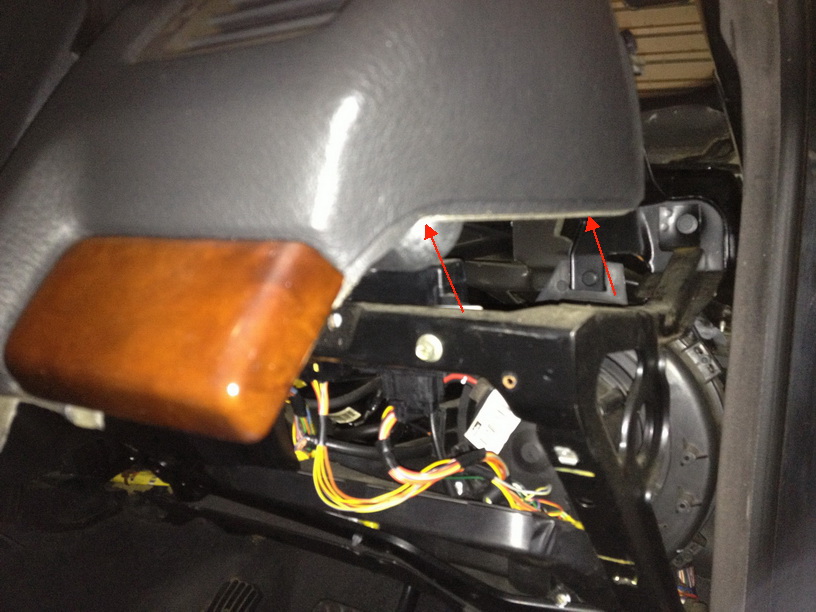 |
| 45 | Finally, you need to free up the wires that go to the light sensor and alarm LED at the front centre of the upper dash. Just reach up and untangle the wires from the plastic clip | 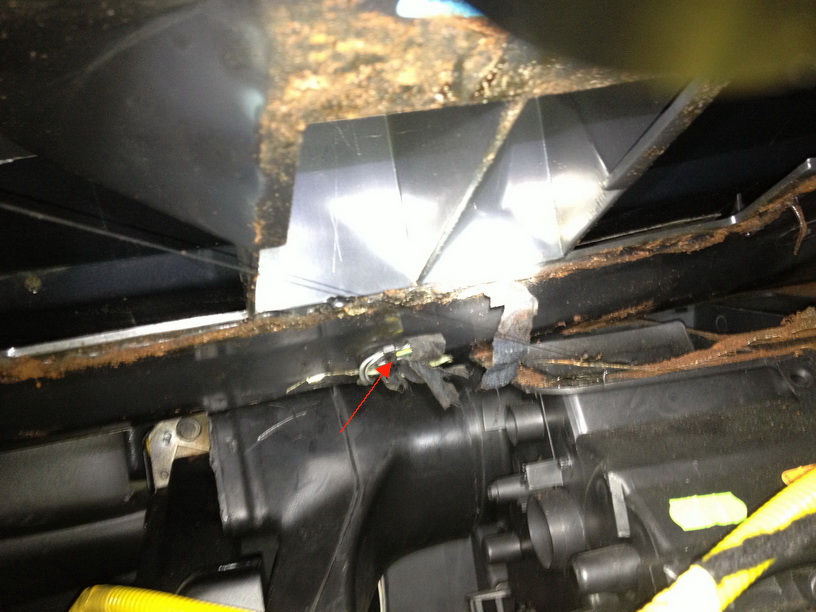 |
| 46 | The dash can now be maneuvered above the steering wheel and out through the passenger door. | 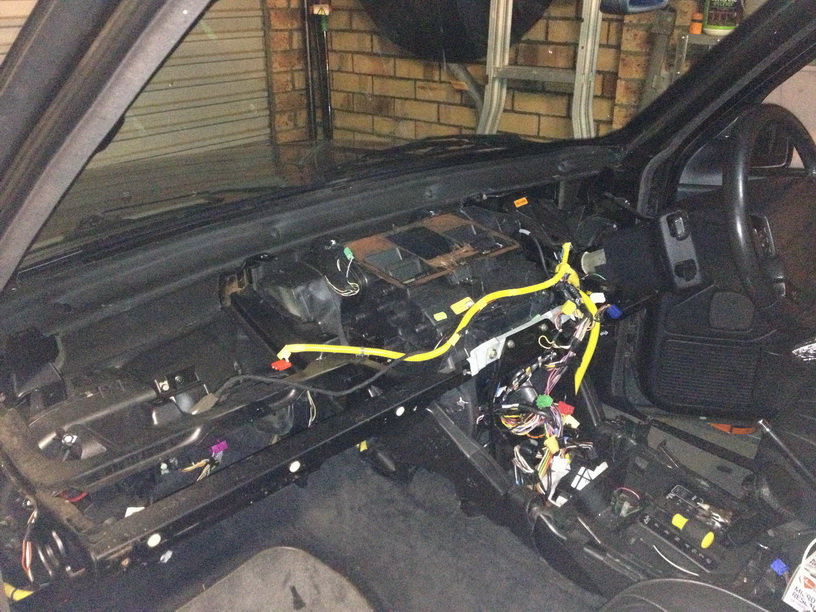 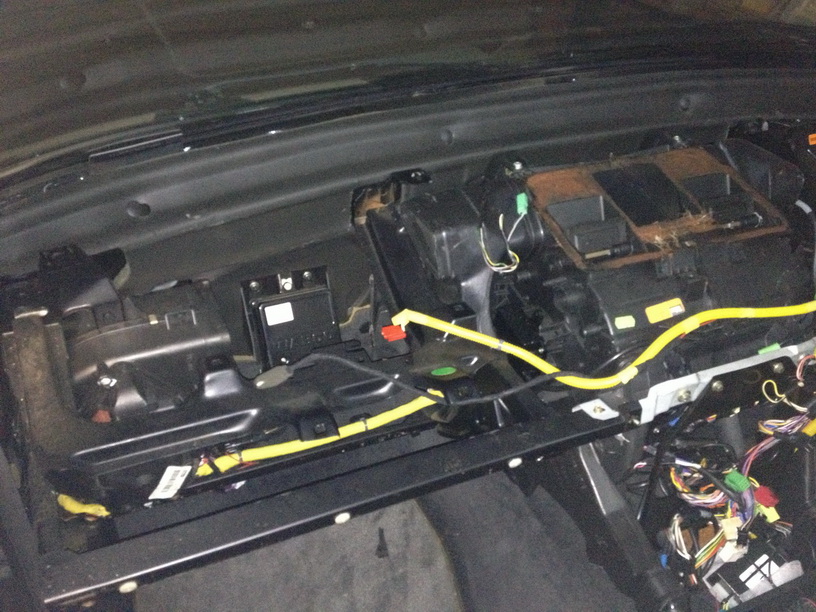
|
| 47 | Store the dash top somewhere flat so it does not get bent out of shape. | 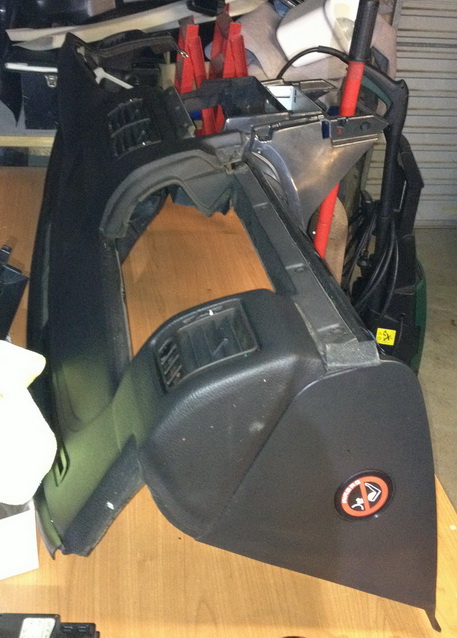 |
| Hopefully, you have collected and labelled all of the screws, bolts and fittings along the way. |  |
Reassembly is pretty much a reverse of the the above steps.
A few pointers:
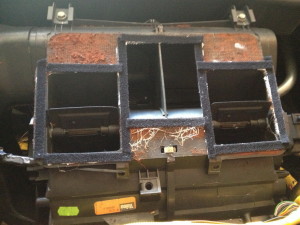
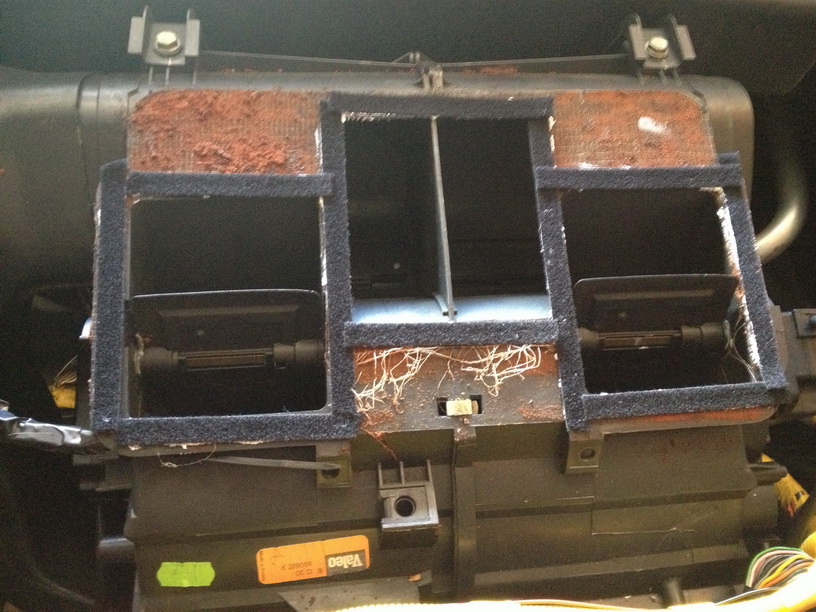
- the sealing material around the top vents of the heater assembly will probably be worn. Replace it with a suitable draft sealing tape or similar.
- Use duct tape to seal the air duct joins as best you can while reassembling them.
- Take your time realigning the dash when you put it back in. It took me ages to get mine in straight, with some gentle persuasion to the 4 mounts under the windscreen.
- If you have been doing the blend motors or heater core o-rings, remember to put the RH vertical duct back before putting the dash on… D’oh!