
This is how I replaced the original Land Rover heater core on my 2000 4.6 HSE with a late 90’s Audi A6 heater core. Why? The o-rings in the join between the LR heater core and the pipes that go to the engine are prone to leaking, either due to knocking the pipes while working on the engine or due to age and brittleness of the o-rings themselves. I had read about some guys in the USA doing the swap in this thread (http://www.rangerovers.net/forum/7-range-rover-mark-ii-p38/30790-o-rings-done-not-leak-though-2.html) at rangerovers.net but could not find a write-up for Right Hand Drive (RHD) vehicles, so decided to do one myself.
(Update Aug-2015) It is possible to replace the heater core without removing the entire dash, but it involves cutting the brackets that support the underside of the dash. In the write-up below, I cut these brackets with the dash out, which made it easy to replace the replacement heater core when it failed (should have bought a genuine Audi unit instead of an eBay one perhaps?).
The write-up below assumes you are removing the dash. If you are just going to cut the brackets and do it that way, remember you will still have to remove the underside of the RH dash, the trim panel on the side of the centre console, plus remove a couple of the air ducts and force a wiring loom out of the way while you manoeuvre the heater core out and ease the new one in.
Here goes…
Remove the Dash
First step is to remove the dash. Feel free to use my write-up at https://paulp38a.com/range-rover-p38/dash-removal/ as a guide.
Almost all of the steps below assume that the dash has been removed, and the heater box is still in the vehicle.
|
Step |
Description |
Image |
| 1 | After removing the dash, next step is to drain the cooling system, including the heater core.To drain the heater core without making a mess inside the cabin I disconnected one hose in the engine bay and attached some tubing and blew through it until my lungs hurt. This displaced almost all coolant from the core. | 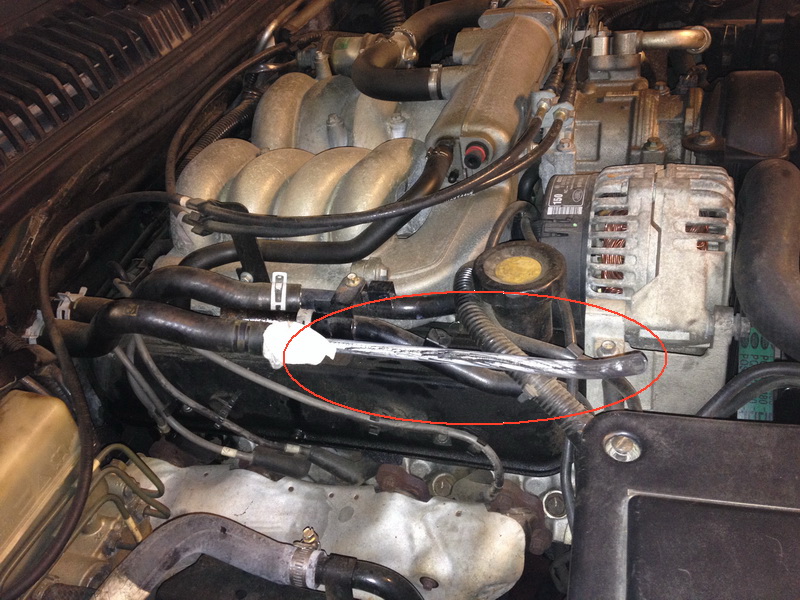 |
| 2 | Now we can remove the screw/bolt that holds the clamp securing the pipes to the old heater core.This view from inside the foot well on the front drivers side, just in case you are not sure where the heater core is. | 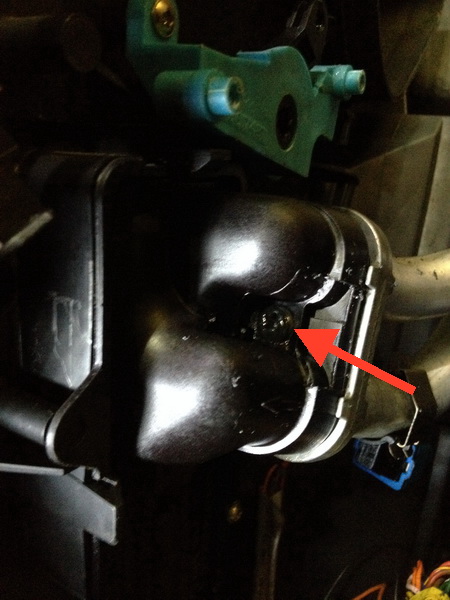 |
| 3 | Viewed from above, showing the outlet pipe temperature sender on the lower pipe. Just un-clip the temperature sender as we will need it again later.Disconnect the pipes at the heater core and also in the engine bay. Plug the ends with bits of rag to prevent spillage and pull them through the firewall. | 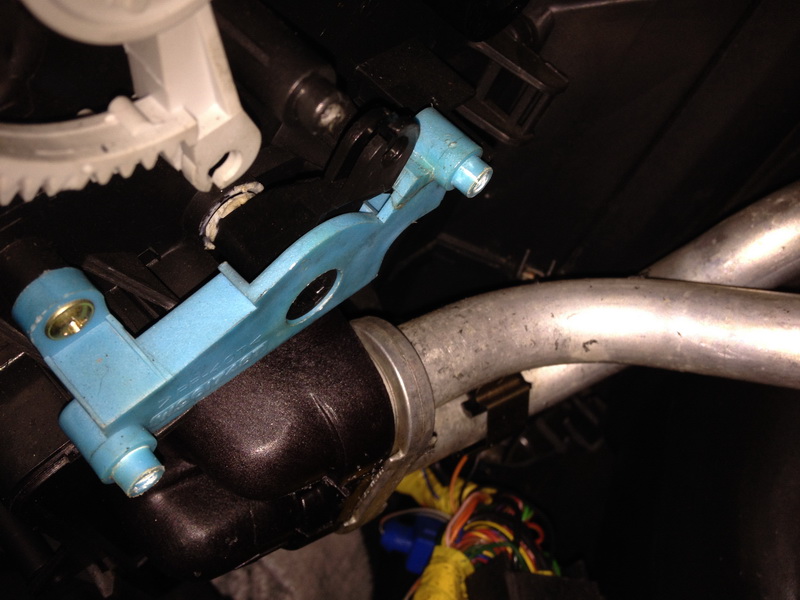 |
| 4 | With the pipes removed, we can remove the two screws holding the heater core housing in place. |  |
| 5 | We need to cut the metal frame obstructing removal of the heater core.At the front left of the driver’s side foot well, remove the two bolts securing the frame. One bolt already removed in this photo. |  |
| 6 | Now we can cut the frame.Make sure there are no wires or other things in the way that you don’t want to accidentally cut. I tied the nearby wiring loom well out of the way and used some rags to protect the carpet and nearby parts before cutting with my Dremel.The red marks in these two photos show where I made the cuts. | 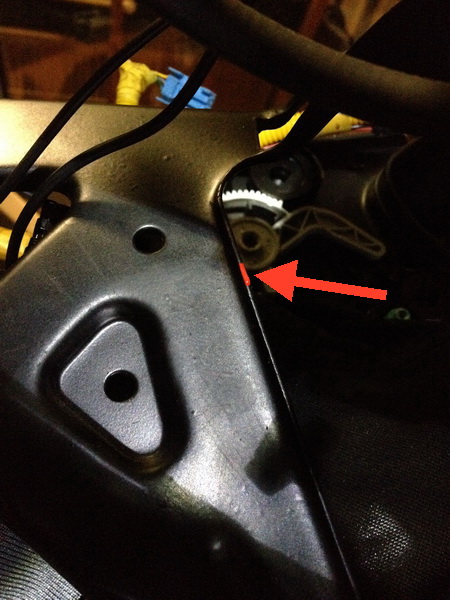  |
| 7 | With the frame cut and removed, the old heater core will slide out. |  |
| 8 | With heater core removed. | 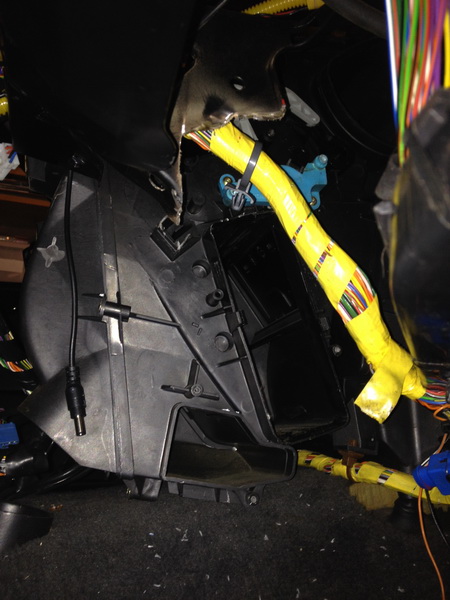 |
| 9 | Comparison of old and new heater cores.The LR heater core is 43mm wide and 157mm tall, whereas the Audi heater core is 7mm wider and 6mm taller. This means we will need to cut the inner rib inside the heater box to accommodate the Audi unit. |  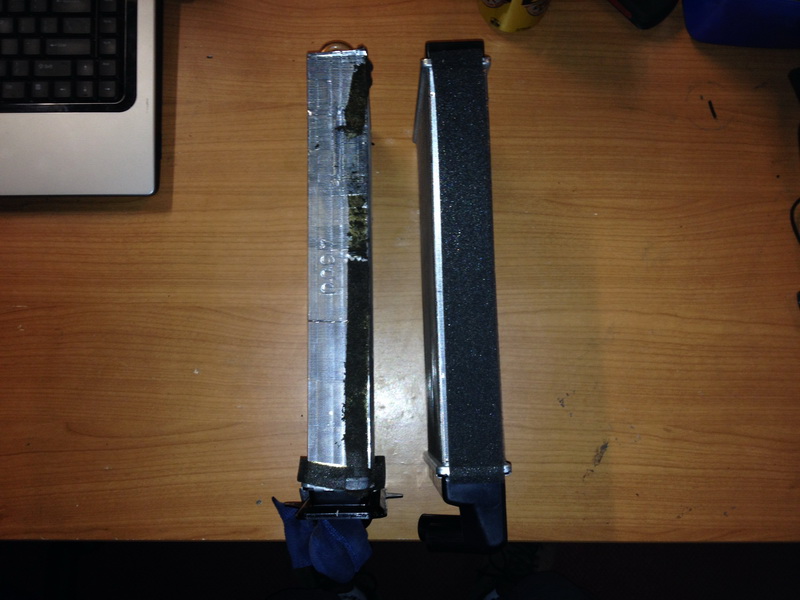 |
| 10 | Before shot | 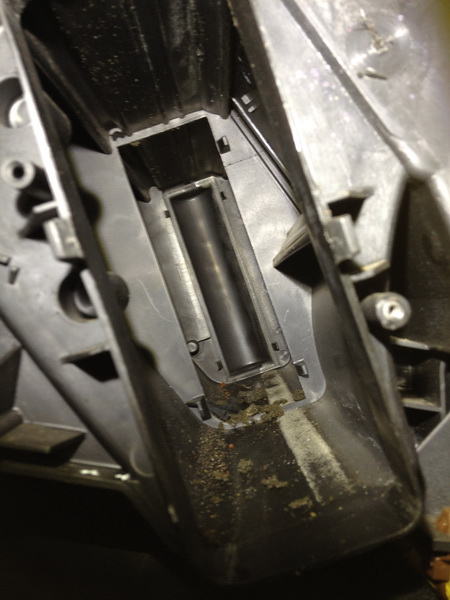 |
| 11 | After shot |  |
| 12 | Sliding the Audi heater core in. | 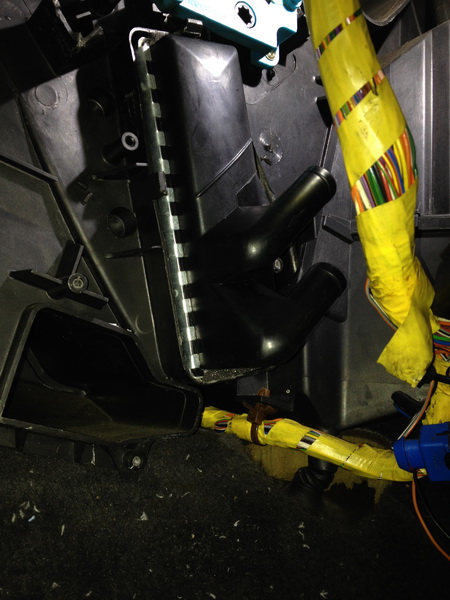 |
| 13 | I modified this universal car stereo bracket to secure the Audi heater core, and using the original heater box screw holes. |  |
| 14 | Heater core secured with the bracket, and some gap-filler foam strip to reduce heat escape. | 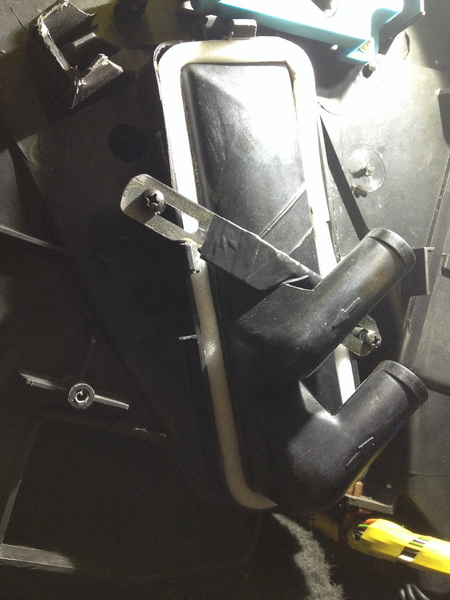 |
| 15 | 5/8? heater hoses temporarily held to the pipes and run through the firewall for length checking and cutting. | 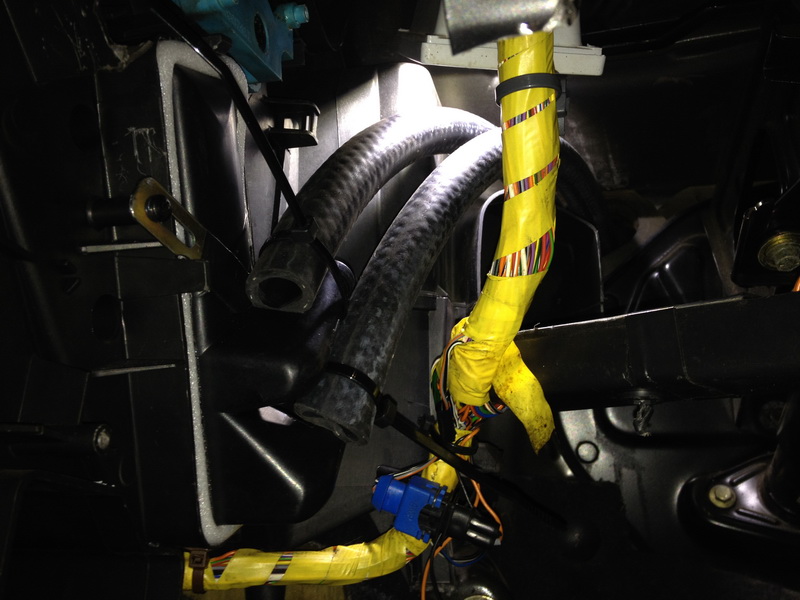 |
| 16 | In the engine bay, 5/8? to 3/4? adapters are used to connect the new 5/8? hose to cut lengths of the old 3/4? hose. | 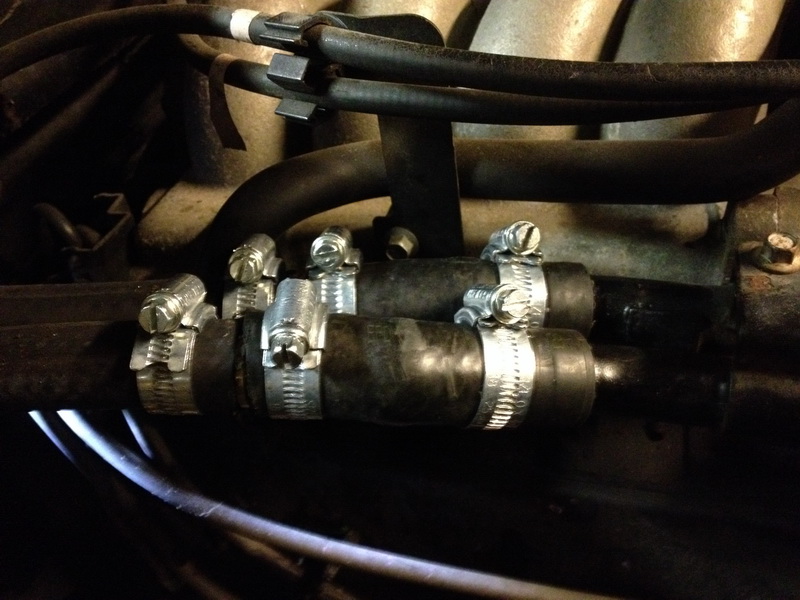 |
| 17 | Next secure the hoses to the heater core using Jubilee Clips. Make sure you use quality clips here. You do not want some cheap clip failing and getting your feet sprayed with hot coolant!Notice the temperature sensor has been attached to the outlet hose (lower hose). This is necessary to let the HEVAC ECU know when the heater core has reached temperature to permit hot air to flow. | 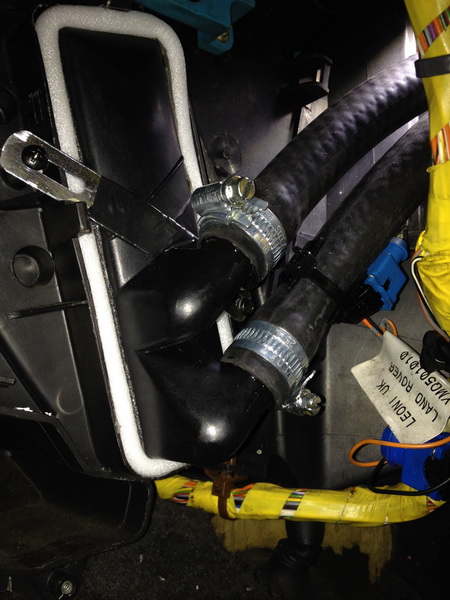 |
| 18 | Now we have to repair the frame we cut earlier.I found these brackets lying about, so cut them to size, drilled new holes in the L-brackets and painted them black for looks. | 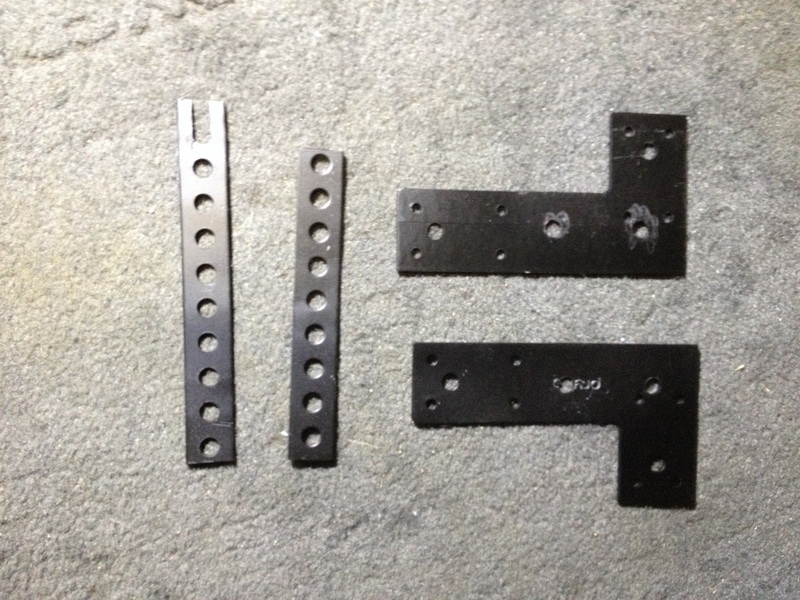 |
| 19 | Using a bracket on each side of the cut, bolts, washers and nuts hold the frame together. | 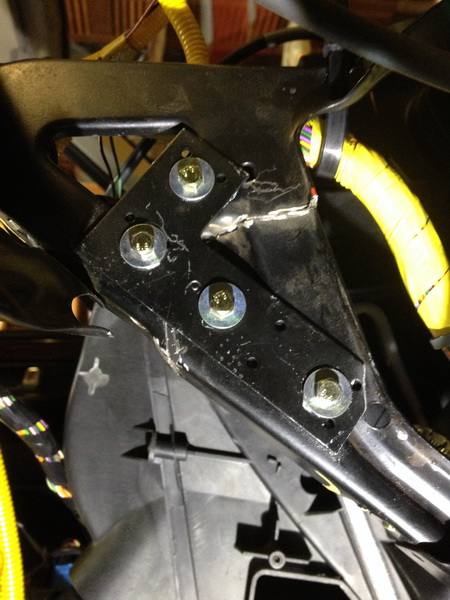  |
| 20 | Replace the two bolts in the front left frame we removed earlier. | |
| 21 | Replace the dash. | Refer https://paulp38a.com/range-rover-p38/dash-removal/ |
| 22 | Refill the cooling system, making sure there are no air locks in the system. | See Tips below. |
Tips For Refilling The Cooling System
- Set the HEVAC temperature to HI and blowers to full. This does nothing to assist clearing air locks in the system on a P38 but does let you know when hot coolant is circulating through the heater core.
- Replace the drain plug at the bottom of the radiator.
- If you have the two heater hoses disconnected in the engine bay, fill one with coolant slowly until coolant flows out of the other hose. Collect spillage with a container. This will get most of the air out of the new heater core. Connect hoses and tighten clamps.
- Fill the cooling system slowly through the expansion tank until it is at normal level.
- Disconnect the small return hose at the top right of the radiator so you can see when the radiator is full. Careful, the small pipe can get brittle and break. Some people prefer to disconnect the return line at the expansion tank instead.
- Replace the hose as soon as you see a steady flow of coolant (it will be hot!) coming out.
- Start the engine and let it run for a few minutes, topping up the coolant as needed.
- While the engine is cold, I leave the cap off the expansion tank. As it warms up, I put the cap on each time between top-ups. If you need to stop the engine, replace the cap on the expansion tank first as coolant will overflow quickly at this stage.
- As the engine reaches operating temperature, the thermostat will open up and more coolant is needed. Run the engine at 1500-2000 rpm in bursts of 10-20 seconds and observe the expansion tank. Fill as needed, replacing the cap on the expansion tank each time.
- When you feel hot air blowing in the cabin, this means that the heater core temperature sensor has granted the HEVAC control, and that hot coolant is passing through the heater core.